
EBOOT 30 Pieces Photoresistor
4.6Editor score
30 piece bulk pack
5mm GM5539 resistors
Wide operating temperature
Compare the top light sensors for Arduino projects. This guide reviews ten models for accuracy, compatibility, and ease of use in DIY automation tasks.
Light sensors are essential components for any Arduino project involving automation or environmental monitoring. They allow your microcontroller to react to changes in ambient light, enabling smart homes, security systems, and interactive displays.
We evaluated ten popular light sensor modules based on their accuracy, ease of integration, and reliability. Our comparison covers photoresistors, digital modules, and professional ambient light sensors to help you choose the right tool.
Each pick highlights key features, technical specs, and ideal use cases for your next build. Please note that product availability and pricing can change rapidly, so verify details before purchasing your components.
4.6Editor score

4.4Editor score
5.0Editor score
The following table compares all ten top-rated light sensors side by side. We focus on key technical specifications, output types, and compatibility to help you decide quickly.


This module combines a 5mm LDR with an LM393 comparator to offer both digital and analog outputs. It holds a solid 4.4 rating and is ideal for general ambient light detection tasks.
We may earn a commission when you buy through this link, at no additional cost to you.
The key strength lies in its built-in comparator which ensures a clean signal even in fluctuating light conditions. The potentiometer allows you to set a specific brightness threshold for triggering digital switches.
While the mounting holes are small and the potentiometer can sometimes feel loose, the module provides strong driving capability above 15mA. This makes it reliable for driving relays directly.
Anyone building a basic light-activated switch or night light will find this module perfect. Its combination of analog flexibility and digital simplicity makes it a top recommendation for most Arduino users.
The LM393 chip ensures your digital output remains stable without needing complex code to filter noise from the sensor.
Running on 3.3V to 5V means it works seamlessly with both standard Arduino boards and modern 3.3V microcontrollers like the ESP32.
We may earn a commission when you buy through this link, at no additional cost to you.
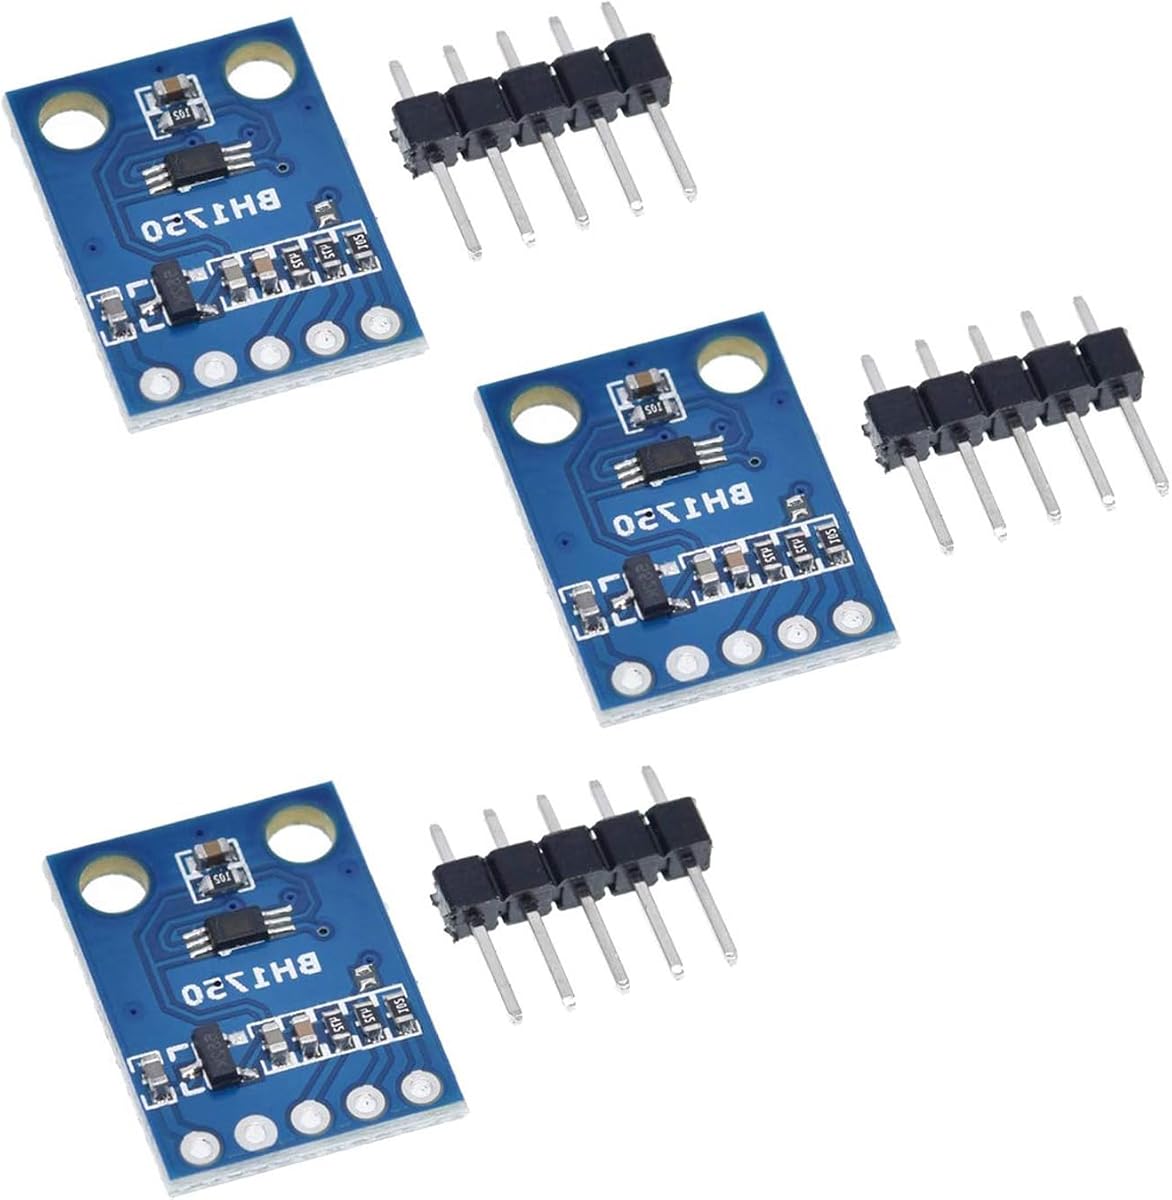
The GY-302 module uses the BH1750FVI chip to provide accurate digital light intensity readings directly in lux. It is highly rated at 4.7 and offers better precision than simple photoresistors.
We may earn a commission when you buy through this link, at no additional cost to you.
Its main benefit is the direct digital output via I2C which removes the need for analog-to-digital conversion logic. You get reliable data that corresponds to actual light levels in your environment.
The only minor drawbacks are the need for pull-up resistors on the SDA and SCL lines and a slightly higher price point. These are standard requirements for I2C devices and worth the cost for accuracy.
This sensor is the best choice for weather stations or light logging projects where exact lux values matter. If you need specific numbers rather than just bright or dark signals choose this pack.
Unlike analog sensors this module gives you the actual light intensity value which simplifies calibration and data logging significantly.
At just 13.9mm x 18.5mm it fits easily into tight spaces on your breadboard or custom PCB without cluttering your setup.
We may earn a commission when you buy through this link, at no additional cost to you.
HiLetgo is a well known brand in the Arduino community and this module delivers on that reputation. It uses the same high quality BH1750FVI chip for accurate light detection.
We may earn a commission when you buy through this link, at no additional cost to you.
The key strength is the consistency in quality control. You get modules that perform reliably right out of the box which is crucial for classroom or production environments.
While the packaging might vary and no protective case is included the module itself is robust. The clear labeling makes wiring straightforward even for beginners.
Buy this if you need a reliable digital light sensor for multiple projects. The brand trust and consistent performance make it a safe choice for serious hobbyists.
Each module in the pack performs identically which helps when building projects with multiple light sensors.
Pins are clearly labeled which reduces wiring errors during prototyping and assembly.
We may earn a commission when you buy through this link, at no additional cost to you.
This module is distinct because it uses a photodiode that only senses light coming directly from front. It has a 4.5 rating and is perfect when you need to detect specific light sources.
We may earn a commission when you buy through this link, at no additional cost to you.
The directional nature is the main advantage allowing you to ignore ambient noise and focus on a specific beam. It also offers both digital and analog output for flexibility.
The downside is that it must be aligned carefully to work effectively. Also the board is quite small which can be tricky for soldering if you modify the connections.
Ideal for safety beams or light tracking robots this module offers excellent value in a 10 pack. If directionality matters for your project this is the right sensor to use.
The directional feature ensures you only react to light from a specific angle improving reliability in complex environments.
Getting ten modules allows you to build multiple sensors or spare parts for larger installations.
We may earn a commission when you buy through this link, at no additional cost to you.
If you need a lot of light sensors this bulk pack is unbeatable. Each component is a standard 5mm photoresistor rated at 4.6 which is great for workshops.
We may earn a commission when you buy through this link, at no additional cost to you.
The main benefit is the quantity and low cost per unit. You can build dozens of circuits without worrying about running out of components.
You must provide your own external resistor to create a voltage divider but this is standard practice for LDRs. The high voltage rating allows use in more industrial contexts too.
Perfect for classrooms or prototyping multiple designs this pack saves money in the long run. Choose this if you want simple resistors to build custom circuits with.
Purchasing a large quantity lowers the cost per sensor significantly compared to buying pre-made modules.
Without a fixed module you can design your own circuit layout for unique form factors.
We may earn a commission when you buy through this link, at no additional cost to you.
This module from Teyleten Robot is designed to drive external devices like relays directly. It has a 4.6 rating and is excellent for automation tasks requiring switching.
We may earn a commission when you buy through this link, at no additional cost to you.
The digital output changes cleanly between high and low based on light intensity. This makes interfacing with microcontrollers straightforward and reliable.
Some users find the potentiometer tight to adjust but this also keeps the setting stable once tuned. The pack of ten allows for multiple setups in one purchase.
Best for automated lighting or alarm systems this module offers practical utility. If you need to switch high power devices based on light it is a strong option.
The comparator ensures sharp transitions between high and low which reduces false triggering in code.
The output current is sufficient to trigger standard relay modules without an intermediate transistor.
We may earn a commission when you buy through this link, at no additional cost to you.
This pack is specifically noted for compatibility with ESP32 and ESP8266 boards. It holds a 4.6 rating and comes with tutorials to help you get started quickly.
We may earn a commission when you buy through this link, at no additional cost to you.
The main benefit is the ease of use for wireless projects. Having both digital and analog outputs gives you flexibility in how you read the data.
The limited quantity of four is suitable for small projects but not bulk work. The basic plastic housing is functional but not durable for rough handling.
Ideal for IoT light sensors this module bridges the gap between hardware and code. If you use WiFi enabled microcontrollers and need tutorials this is a great start.
Works seamlessly with the popular 3.3V logic used by ESP32 boards without voltage dividers.
The included tutorials save time on documentation and help beginners understand the sensor logic.
We may earn a commission when you buy through this link, at no additional cost to you.
This is the ultimate supply for bulk light sensors with an impressive 4.9 rating. It includes 50 GL5516 resistors which are the standard choice for most projects.
We may earn a commission when you buy through this link, at no additional cost to you.
The key advantage is the sheer quantity which allows for large scale production or extensive prototyping. The resistance values are consistent with industry standards.
Like other resistor packs you need to wire them externally. They are bare components so you must mount them securely on a PCB or breadboard.
Best for classrooms or manufacturing runs this set ensures you never run out. If you need a large inventory of standard light sensors this is the most reliable option.
GL5516 resistors are widely supported in libraries and code examples for easy integration.
Fifty pieces mean you can test many prototypes before settling on a final design.
We may earn a commission when you buy through this link, at no additional cost to you.
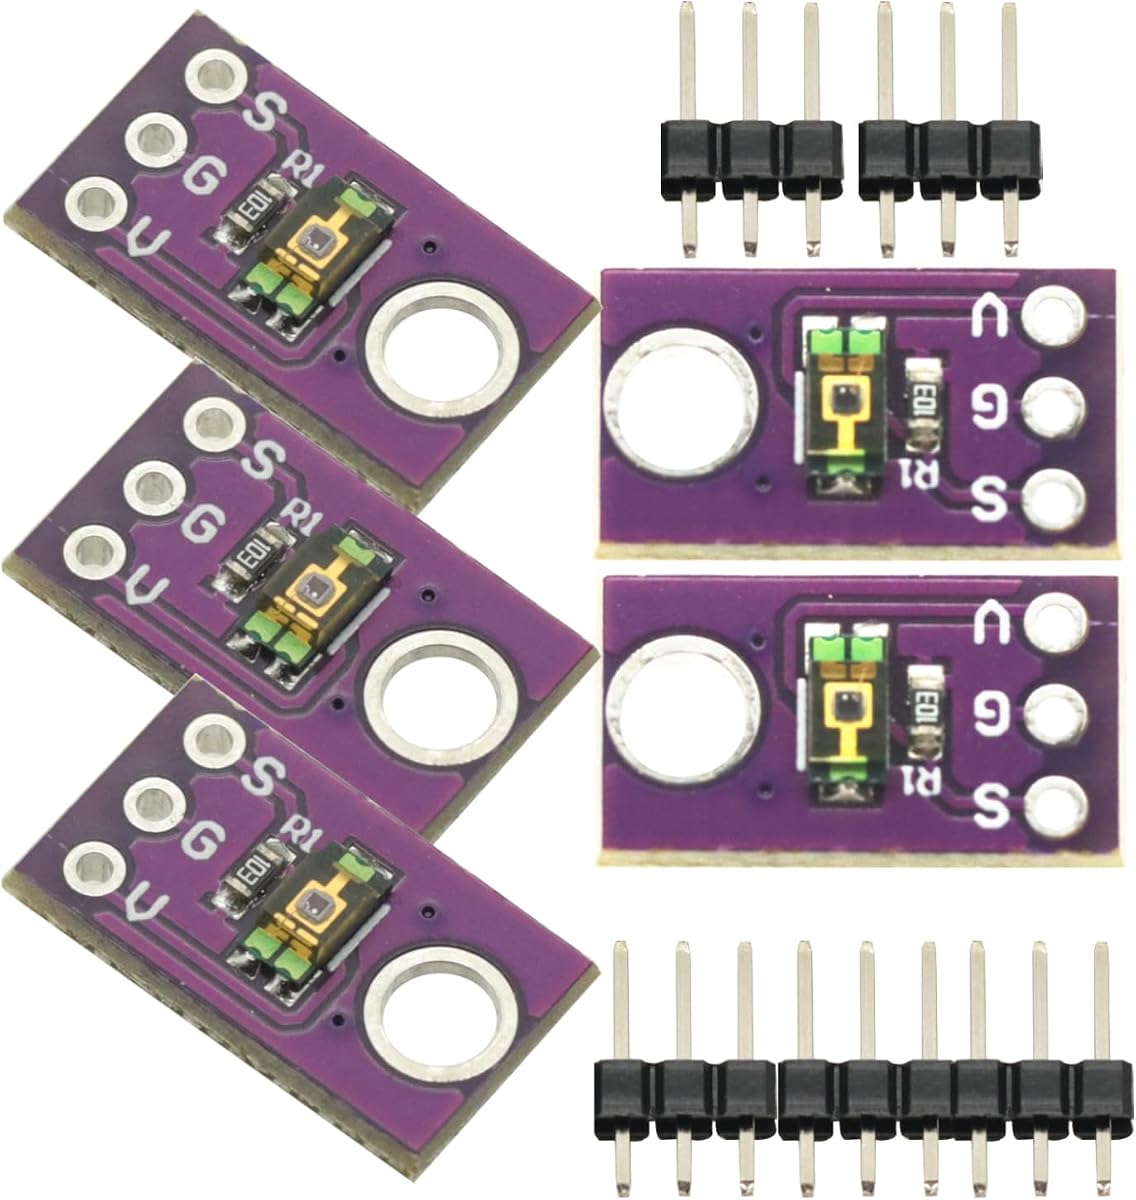
This is the most professional sensor on the list with a perfect 5.0 rating. It is designed for display backlight dimming and high precision ambient monitoring.
We may earn a commission when you buy through this link, at no additional cost to you.
The main benefit is its industrial grade accuracy which is crucial for consumer electronics and sensitive automation. The output is linear and reliable.
While it costs more than hobby modules the performance justifies it. The packaging is minimal so ensure you have a proper housing for outdoor or robust indoor use.
Choose this for premium projects where light quality matters. If you are building a commercial product this module meets higher standards than generic hobby sensors.
The output matches human eye sensitivity better than basic LDRs making it ideal for user interfaces.
These sensors are built to meet rigorous quality control standards for critical applications.
We may earn a commission when you buy through this link, at no additional cost to you.
This module by uxcell is highlighted for smart car applications and light detection. It holds a 4.6 rating and offers reliable dual output options for versatile coding.
We may earn a commission when you buy through this link, at no additional cost to you.
Its stability makes it suitable for vehicle environments where voltage fluctuates. The 3.3V to 5V range ensures it works with modern automotive electronics.
The small pack size is limiting for larger builds but good for small prototypes. The module uses standard LM393 comparators for robust switching performance.
Best for robotics and car automation this module offers reliable performance. If you need a sturdy sensor for moving platforms this is a good choice.
The wide input range ensures it functions correctly even when power supplies fluctuate in dynamic environments.
Having both digital and analog signals lets you use the same hardware for different logic types.
We may earn a commission when you buy through this link, at no additional cost to you.
Selecting the right light sensor involves considering how you need to measure light. This guide breaks down the key factors to ensure you buy the right component.
The most common types are photoresistors (LDRs) and photodiodes or phototransistors. Photoresistors are the simplest and cheapest option ideal for hobby projects where high precision is not critical. They change resistance based on light levels and require a voltage divider circuit to read with an Arduino. Photodiodes and phototransistors are faster and more sensitive which is useful for detecting rapid light changes.
Choose a photoresistor for simple ambient light detection and a photodiode for high speed applications like light communication.
Modules typically offer analog or digital outputs. Analog modules provide a voltage that changes with light intensity allowing you to read a range of values. This is useful if you need to know exactly how dark or bright it is. Digital modules include a comparator that triggers a high or low signal when a set threshold is crossed.
Select analog for data logging and digital for simple switch actions like turning on a light.
Some advanced modules like the BH1750 use I2C or SPI interfaces. These send digital data directly reducing the load on the microcontroller and offering higher precision. Standard analog sensors require you to read an analog pin and convert the value in code. I2C devices save analog pins which is crucial when using sensors with many inputs.
Use I2C if you need precision and have limited analog pins available on your board.
Arduino boards operate at either 3.3V or 5V. Ensure your sensor supports the logic voltage of your controller. Most modules cover both ranges but some older or specialized sensors might be 5V only. Mismatched voltages can damage the sensor or the microcontroller.
Always check the datasheet to confirm the voltage range matches your specific microcontroller.
Light sensors react differently to different wavelengths of light. Some are optimized for visible light while others might be sensitive to infrared. For general ambient light detection you want a sensor that matches human eye sensitivity. If you are working with infrared beams ensure the sensor is tuned to that frequency.
Match the sensor spectral response to the type of light you intend to detect.
Modules come in various sizes from bare components to larger breakout boards. Breakout boards are easier to use for prototyping because they have clearly labeled pins. Bare components require soldering which is better for final custom PCBs. Consider how much space your project enclosure allows.
Choose breakout boards for breadboards and bare components for compact custom designs.
Reputable brands often provide higher quality chips that remain consistent. Cheap modules might use inferior resistors that drift over time. Look for mentions of specific chips like ROHM or Vishay if you need reliability. This ensures your readings stay accurate after months of use.
Invest in well known brands for critical projects that require long term stability.
Buying in bulk often reduces the cost per unit significantly. If you plan to build multiple sensors check bulk packs. Single modules are convenient for testing but can be expensive in the long run. Balance your need with your budget.
Buy bulk packs if you plan to create a fleet of sensors or for classroom use.
To use a basic photoresistor module connect VCC to 5V and GND to ground. The output pin goes to an analog input on your Arduino. Upload a sketch that reads the analog pin and maps the value to a range between 0 and 1023. This value represents the light intensity.
For digital modules with a threshold potentiometer adjust the screw until the LED turns on or off. Connect the output pin to a digital input pin. Use the input in an if statement to trigger actions when light levels change. This allows you to control lights or motors automatically.
To protect your sensors avoid exposing them to direct water or harsh chemicals. If using outdoors ensure the module is inside a weatherproof housing. Clean the lens gently with a soft cloth to prevent dust from affecting the readings. Proper maintenance ensures accurate data over time.
A photoresistor changes its resistance based on light and is slow but simple. A photodiode generates current proportional to light and is much faster. Use photoresistors for general light detection and photodiodes for speed.
Most modules already include the resistor inside. If using a bare component you must connect a resistor to form a voltage divider to read the analog signal correctly.
Place the sensor in your target environment and read the baseline values. Adjust the code threshold or potentiometer to match your specific needs. This ensures accurate triggering for your project.
Yes most modern modules support 3.3V to 5V inputs. Check the voltage range in the specs before connecting. Always ensure the logic level matches your board to avoid damage.
Most hobby modules cover from total darkness to bright sunlight. Some advanced sensors like BH1750 offer precise lux readings. The range depends on the specific chip used.
Electrical interference or loose wiring can cause noise. Use a capacitor on the power pins and secure all connections. Code can also smooth values using a moving average filter.
We have reviewed ten excellent light sensors ranging from bulk resistors to professional modules. The WWZMDiB module stands out as a balanced choice for most hobbyists. The TEMT6000 remains the top option for high precision professional applications.
Consider what output type you need before buying. If you need simple switching a digital module is ideal. If you need precise light logging an I2C digital module is better. Always ensure voltage compatibility with your board.
Prices and availability change frequently so verify current details on the retailer page before ordering. We hope this guide helps you find the perfect sensor for your next Arduino project.